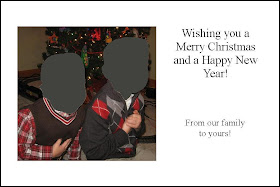
Christmas cards, party invitations, thank you notes,
birth announcements, moving announcements and more!
 |
| sample postcard layouts for every occasion |
I enjoy designing my own cards and printing them as a 4” x 6” print is so cheap and easy. I can print as many as I want and if I realize last minute that I need a few more it’s no problem, in an hour I have whatever additional amount I need. I don’t have to pay a designer since I’m designing it. It’s versatile, I can choose to send it as a postcard with a postcard stamp on the back or put it in an invitation sized envelope if I want it to be a little fancier, at Christmas I put it in a business sized envelope with a yearly letter.
Here’s how I make my postcards and a few design tips to help make your cards look unified and professional.
Design Tips
- One of the things I use all the time from art school is something called visual hierarchy. Make the most important thing(s) stand out by using contrast (size, color, font).
- Keep it simple! Using too many fonts makes the elements compete with each other. The viewer’s eye can’t decide what to look at first and the design gets too busy. You’ll break down the visual hierarchy!
- Unify your design by pulling colors out of your photo and use them for the background, border on your photos and/or text. Unify a group of photos by changing them to black and white or sepia (changing a photo to grayscale can be done right in Publisher, to change a photo to sepia I use IrfanView – click on “image”, scroll down the drop menu to “effects” and choose “sepia”)
- Rule of odds: the most interesting and dynamic designs use an odd number of elements.
Instructions
1. Start with a canvas size or document size of 4” x 6” (that’s 1000 x 1500 pixels)
I usually lay my designs out in Microsoft Publisher.
2. Choose a photo for your postcard.
3. Type in the information and play with the color, size, font and font style (bold/italic etc)Decide if the text should be right justified, centered or left justified or some combination. (This can be tweaked later on.)
4. Pull a background color from your photo to unify the design. I also added a border on my photo with another color pulled from the photo. (in Publisher this is very easy, just right click your picture choose "format picture..." on the pop up menu and click the first tab in the pop up window "colors and lines"choose your line color and weight.) This will help the photo stand out from the background.
5. Pull out elements from the photo, like colors or patterns. For example this year our Christmas card has an argyle pattern on the background that I made to match my son’s sweater. Check out www.flickr.com for photos that can be used for background, textures and fabric patterns make nice backgrounds. Be sure to choose to search “creative commons” in the advanced search section for images that you are allowed to use or adapt.
6. Add clip art if you have dead space and are uncomfortable designing your own element. Choose wisely, poorly chosen clipart will cheapen the look of your design very quickly! And keep it simple by limiting the number of pieces of clipart you use.
7. Change the background of your text box to add bands of color behind your text to make it stand out or make it easier to read. Drag the edges of the text box to the edge of your document so the color runs from edge to edge if you want it to be a band of color rather than a box. Right click the text box and choose “Format Text Box…” choose the first tab “colors and lines” on the window that pops up. Choose a color and drag the bar labeled “transparency” to allow some color to show through from the background.
8. Make sure you leave enough of a margin so that nothing important gets clipped off since it’s hard to tell exactly where the edge of the print will be.
9. Save your work as a publisher document so you can tweak things later if necessary.
10. Save your image as a Jpeg and increase the quality to printing quality (300dpi)
11. For the first few cards I designed I would print one proof to check that everything was just how I wanted it. Then I could tweak anything that needed it and print my big order after that. I print my cards at Sam’s Club. I upload them online and when I check out I always check the box near the top of the cart that says “Turn off in-Club color correction for all prints and posters in your order.”
For some reason when I don’t check this box there is a weird fuzziness around my text.
I’ve found this to be a fun, cost effective way to make personalized photo cards for lots of occasions and hope this tutorial will give you some help in making your own designs for your little ones.


No comments:
Post a Comment