Sunday, October 21, 2012

Literary Lunch: Jack-o-Lantern Bagels


The Legend of Spookley
the Square Pumpkin by Joe Troiano

We found Pumpkin spice cream cheese in the grocery store this week.  To get in the Autumn/Halloween mode we spread some on mini bagels and used a small pretzel stick for the stem and added facial features with mini letter shaped pretzels.  We also tried to make a “Spookley the Square Pumpkin”  by Joe Troiano by cutting whole wheat bread into a square .  To make them look more like they are in the pumpkin patch we added some lettuce leaves and parsley for a garnish.  Pair these simple pumpkin bagels with some apple slices sprinkled with cinnamon and enjoy with your favorite Halloween book!    


It's the Great Pumpkin Charlie Brown
by Charles M. Schulz

The Biggest Pumpkin Ever
by Steven Kroll


Monday, October 1, 2012

Creating a Bedroom for Creative Little Hearts


This summer we transitioned our two boys into a new room that they share.  I tried to think about how to maximize the space we have and how to incorporate things that the boys love in order to make their space truly their own.  I started by defining how we use the space before moving everything in.  I want each of our bedrooms to be places of rest without the distraction of electronics or flashy toys, so the television and most toys and devices live downstairs in the living room and toy room.  A cozy corner to wind down with some books at the end of the day is a must for their bedroom.  This area can also double as a place for our youngest to have some afternoon quiet time to rest and nap.   Mostly we need a place for sleeping, and storage for clothing and books. 
The first thing we were looking for was a set of sturdy bunk beds that could be set up as two twin beds until our youngest is old enough to climb without falling.  We lucked out and bought a used set from friends down our street!  My husband convinced me to look at some used furniture and we have been able to outfit each of the boys with a dresser of their own.  Both are better built and less expensive than a lot of new dressers on the market. 
For bedding I searched for denim comforters that serve as a neutral anchor that can be changed and updated with other elements in the room and I hope these will be used right through to college!  I sewed some patchwork pillow shams and a throw pillow that ties together their themes of airplanes and tractors.  Hanging over each bed is their name which I decorated with scrapbooking paper using a decoupage technique.  There are lots of tutorials out there on how to make these. 
decoupage wooden letters with scrapbooking paper
click here for to link to a tutorial on how to make this
Under each bed I have some storage space.  Under one bed I store sheet sets and under the other I placed red canvas bins store small quiet time toys.  Above each bed and in the quiet corner I painted murals that are painted on lauan (thin plywood) and attached to the wall.  These are perfect for homes that have textured walls or for families that may move to a new house in the future.  We moved when our oldest was three and by the end of move-in-day his new room looked and felt a lot like his room, helping with the transition. 
mural on thin lauan plywood
click here for my tutorial
We completed the room with room darkening curtains and glow in the dark stars on the ceiling over each bed of course!  In the end we all love how the room came out.  My two-year-old often tells me how much he loves his “nice airplane”.

cozy corner with pillows and a basket of our favorite books of the moment

Lauan Mural Tutorial

I learned about this process from working on exhibits at a children’s museum and it is a great method for making a moveable mural or to put a mural on a heavily textured wall.  I will never have to paint over my kids murals, just pass them on to someone younger when they out grow them.  That is much less emotional than having to paint high hiding primer over them!
Materials:
·         Sketch or a printout of your image on paper
·         Pencil or chalk
·         Drill with large drill bit
·         Saw horses
·         Jigsaw with fine finish blade
·         Latex Primer
·         Lauan
·         Sand paper or electric handheld sander


Directions:
1.       Prepare your lauan board with a coat of primer.
      2.       Draw your image onto your primed board.

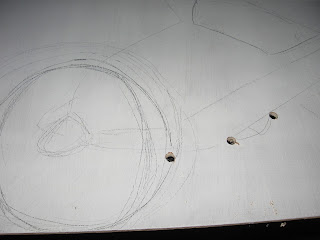
3.       Drill a hole in each corner where you will have to change directions with your saw blade.  Be sure that your blade is smaller than the diameter of the holes you drill.  Imagine that you are creating a dot to dot picture.

4.       Use a jigsaw to cut out your image.

5.       Sand the edges working on the corners to remove any evidence of the drilled hole.


6.       Paint your image with latex or acrylic paint.

7.       Using drywall screws attach your wood cut-out mural to the wall.  Be sure that at least one screw is securely fastened to a stud in the wall.

Patchwork Pillow Sham Tutorial

My mother in law made me a set of placemats like this and I thought it would be perfect for pillow shams for the boy’s beds.  It would add a splash of color without being too frilly.    
Materials (makes 2 pillow shams for standard pillows):
·         1/3 yd each of 3 printed fabrics
·         2 yds solid fabric for backing, I used inexpensive white muslin
·         thread
·         quilter’s batting
·         metal ruler
·         scissors
·         rotary cutter
·         cutting mat
·         straight pins
·         sewing machine
Directions:
1.       Cut printed fabric into 5 inch squares (16 squares of each fabric)
2.       Cut muslin into 5 inch squares (48 total)
3.       Cut batting into 4 inch squares (48 total) (you may find that scissors work better than the rotary cutter for cutting the batting since it stretches a bit)

4.       Sandwich one square of batting between one square of printed fabric and one square of plain fabric or muslin centering the batting to give yourself a half inch seam allowance around the outside edge.  Pin in place. 


5.     Sew a diagonal seam from corner to corner.  (I sew them all one after the other and then snip all the thread connecting them.)  Then sew a diagonal from the opposite corners forming an “X”.

6.       Once you have all the sandwiched squares stitched lay them out to create the pattern you want.  I made diagonal stripes with the three colors repeating across the pillow.  I worked from right to left from the top row down pinning and sewing the squares into horizontal strips.  Be sure to pin back sides together so the seam allowance is actually on the outside of the quilted pillow. 


7.       Once you have all the strips assembled begin sewing the rows together horizontally.  Try to match the corners of the seams as best you can.  (When you cut the fringe it will hide little discrepancies which make this a great project for less experienced quilters!) 


8.       To make the fringe, cut the seam allowance between each square at roughly every half inch or so with your scissors.  (This repetitive action will make your forearm sore so you may want to do this as you go along rather than doing it all at the end.)

9.       Cut a two pieces of your backing fabric or muslin that are roughly 2/3rds of the width of your pillow case.  Hem the center edges (the two pieces will overlap to give a finished look.  Pin in place wrong sides together (right sides out) and sew a half inch seam around the outside edge.


10.   Cut fringe at about every half inch or so around the outside edge. 
11.   Wash with some towels to get the fringe to unravel some and give it a rustic fun finish.  (note whatever is in the wash will get fuzzies and small pieces of thread on them so choose what gets washed in this load wisely.)

Freezer Paper Stencil Throw Pillow Tutorial


When I learned of the magic of freezer paper I was instantly in awe!  This is a fun project and can be done as simple or as complex as you choose!  If you are good with scissors or an exacto knife this is the project for you.  Pillows, clothing, curtains, napkins…the possibilities are endless.


Materials:
·         Freezer Paper (can be found at the grocery store next to aluminum foil and plastic wraps)
·         scissors or exacto knife
·         fabric (sewn to desired pillow size with a descent sized opening to get materials in and out from)
·         waxed paper
·         fabric paint
·         iron
·         ironing board
·         magazines or cutting mat
·         image for tracing
Directions:

1.       Find an appropriately sized image you would like to use.  Be sure that it is simple but has enough detail that it can be identified when depicted as a silhouette.
2.       Trace your image onto the matte side of the freezer paper – the shiny plastic coated side will be ironed against the fabric so your image will be oriented as you see it traced on the matte side.
3.       Cut out your image being sure to leave the outside edge in tact to become your stencil.
4.       Iron your freezer paper onto your fabric.
5.       Place waxed paper inside your pillow to prevent the paint from bleeding through onto the other side.
6.       Carefully and gently paint your silhouette using brushstrokes from the outside towards the middle to prevent the paint from getting worked underneath the edge of your stencil.
7.       Leave it to dry.

8.       Gently peel your stencil off the fabric – if you do this successfully without tearing your stencil you can reuse it.
9.       Remove the waxed paper, stuff your pillow and sew the seam opening closed or place a pillow form into your pillow case.


Below are photos of the airplane pillow in progress.