Tuesday, February 18, 2014

Craft Closet: ideas for organizing your kids art supplies

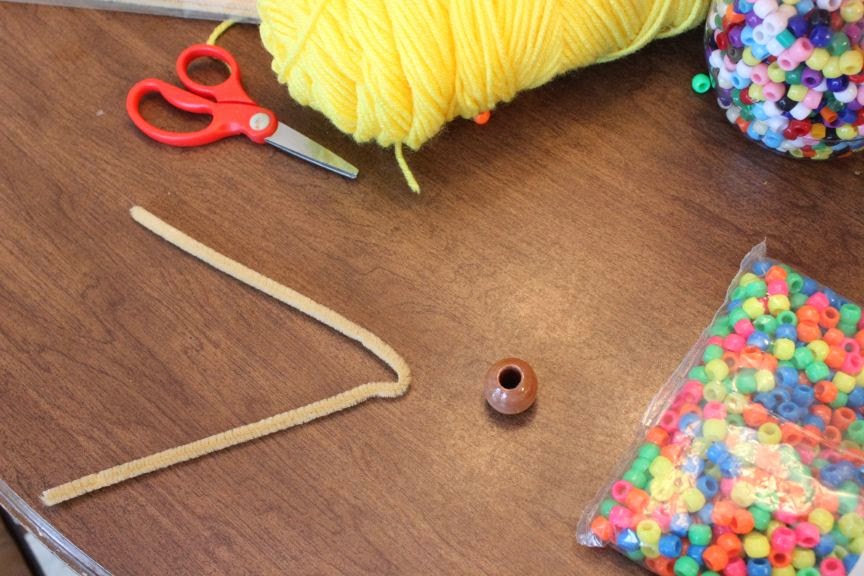
Earlier this week, I led a craft at my son’s playgroup.  I needed some pony beads so I snagged a peanut butter jar full from our stash of craft supplies at home.  At the playgroup I mentioned to the other moms that these jars were great because they’re clear so the kids can see what’s in them and that I keep them on their side in a shoe organizer.  One of the moms asked me to send her a picture.  After I took a picture, I thought I’d share some of the ways I keep my kids arts and crafts supplies organized on my blog. 

We have an odd closet in our basement play area.  The room has a large tiled floor so it’s a great place to spread out and do some messy art.  I took advantage of the rod for hanging coats and hung a sweater storage unit and hanging shoe caddy.  The sweater holder is the perfect size to hold printer paper, construction paper and coloring books.  The topmost compartment has a weaving loom and some embroidery kits that are used less frequently.  
Large plastic peanut butter jars (40 oz.) fit on their side in the hanging shoe organizer.  I soaked mine to remove the label and food residue and then washed them with hot soapy water.  You can also wash them in the top of a dishwasher to get them squeaky clean.  They are great for several reasons.  They are clear so you can see what’s in them without labeling them or having to open them.  They are plastic which is lightweight and won’t shatter if dropped.  And lastly the lid screws on so it doesn’t accidentally pop off, spilling its contents.  Other things fit in these cubbies too, coffee filters, skeins of yarn, duffel bag full of play dough tools, and small paper lunch bags for making puppets. 

A set of stackable bins holds and separates various recyclable odds and ends like spools that once held thread and ribbon, paper towel tubes, shallow plastic containers, divided take out containers, and yogurt containers.  These can be combined to build all kinds of wonderful things or hold supplies while working on a project.  Hanging on removable hooks are smocks and aprons that are within my little guys reach. 


On one end I have an over the door shoe holder attached to the wall with nails.  The clear compartments again allow you to see what is in each pocket.  The pockets are small enough to organize small items and keep like items together.  I keep extra refills in the topmost pockets that are
harder for little hands to reach and regularly used items lower down.  Here you can find pencils, colored pencils, erasers, glue, scissors, watercolor sets, ink pads, clothes pins string, wooden popsicle sticks, boxed crayons, markers, small containers of play dough, small scraps of cloth and paper.

A short three drawer storage unit houses finger paints, glitter, stamps, pipe cleaners, etc.  This is not my favorite storage unit, it gets disorganized every time someone digs around for something.  Limiting like items in each drawer helps.  Between the drawers and the wall we slide larger flat items like pads of paper, jumbo coloring books and drawing boards.  


On top of the drawer unit is a plastic caddy that can be carried to another location, filled with skinny markers, pencils, brushes, wet wipes and small pads of paper and booklets (folded and stapled paper with card stock covers for the kids to write and illustrate their own story books). 


These ideas make a small space into an easily accessible craft studio for my little creative hearts.  What tips do you have for organizing your kids craft supplies?  

Monday, February 17, 2014

Flex Your Fine Motor Skills: How to Make a Bendable Doll

Today we did yoga at our active playgroup that I help facilitate.  Our group is geared for preschoolers
(2-5 year olds, which covers quite a range of ability).  We all did an ABC yoga DVD together and then made flexible dolls out of pipe cleaners.  It worked very well with the 3 and 4 year olds, some of the younger ones enjoyed putting the beads on and giving their doll a haircut, but needed a lot of assistance.  Definitely a good “Mommy and me” activity where there is a one to one ratio for our youngest participants!  (Of course you’ll want to be careful that you don’t give young children small beads if they are prone to putting things in their mouths.)  On the plus side the pipe cleaners are easier to string beads on than string since they have more rigidity to them, the fuzziness gives the beads some traction so they don’t easily slide off and the ends don’t fray.  I blended a couple ideas I had found online and simplified it as much as I could.

The first pipe cleaner doll I found was through pinterest.  I wanted more realistic hair on the dolls, but didn’t want to have to glue it and wait for the glue to dry and using hot glue with a room of preschoolers is not an option.  I also wanted to simplify the number of pipe cleaners used and how the beads were strung so the kids didn’t have to make any knots between the beads.  The second site I found was from a Waldorf School in Los Angeles called The City School.    They had done a much more intricate doll, but the way the hair was incorporated worked well with our project. 

Below are the materials needed for our flexible yoga doll and instructions for making one.

Materials:
43 Plastic Pony Beads (1-neck, 7-each arm, 10- body, 9- each leg)
12” chenille stems (1 and a half per doll)
Large wooden bead for the head
yarn for the hair
shallow container to keep the beads from rolling on the floor
scissors

Fold the long pipe cleaner in half.  Put the loop through the wooden bead. 
Wrap yarn around your hand (about 8 times)and slide it through the loop at the top of the bead.  Pull it gently back towards the bead, pulling a little bit of the yarn into the hole in the bead so that the loop in the pipe cleaner disappears.   There should be enough yarn to make the hair stick into the bead, but not slide through it completely.
You can either cut the loops in the hair now, or give the doll a haircut at the end.
Slide both ends of the pipe cleaners through a pony bead up to the base of the wooden bead to make a neck. 
Wrap the shorter pipe cleaner around the two attached to the head of the doll to make two arms.
Thread 7 beads on each arm and curl the end of the pipe cleaner so the end is tucked into the last bead to form an arm and keep the beads from slipping off.
Next, thread 5 beads on each of the two long pipe cleaners to make the torso, and then twist the pipe cleaners to create hips and thread 9 beads on each leg.  Curl the ends of the pipe cleaners the same way you made the hands to form feet and keep the beads from falling off. 


The end results were pretty successful and the kids will enjoy playing with them and perhaps they will even get their dolls to do a few yoga poses they learned.

Wednesday, February 12, 2014

Valentine Design: a lesson in desktop publishing


I recently posted a tutorial for recycling crayons in the oven with silicon baking molds.  My son had such fun with those that he made heart shaped ones for his classmates for Valentine’s Day.  I turned his valentines into an opportunity to teach him a little desktop publishing using Microsoft Publisher.  Below is a chronological list of our process for using the computer to make the tags pictured above.
 
Determine the Dimensions: First we determined the dimensions of our plastic treat bags.  We used 3”x4” treat bags.  We decided that a 1.5” tall tag looked best so we doubled that to get a 3”x3” square that would be folded in half over the top of the treat bag and stapled in place.  I explained that the top half of the tag would be printed upside down so that once it was folded both sides of the tag would be right side up. 

Rough Draft on Paper: On paper we decided what words should be on each side of the tag.  He liked “you color my world” best for the front and to and from on the back with space to write the recipients name.  I recommended adding a disclaimer that the treat wasn’t edible (I’ve had experience making cinnamon applesauce ornaments with my art club when I was teaching high school, we made them for all the teachers and left them in their mailboxes.  Despite the hole punched in them and hanger attached two bright teachers ate theirs!)  Anyway we added an excerpt of a cute rhyme we found online: “this may look like a sweet treat, but take note, it’s not to eat!” and added this to the back of the tag.

Snap to Guides: Since we knew we needed to make 3”x3” tags we started by adding snap to guides.  I showed him the rulers on the top and side to help us create the right sized tags.  Just click on the ruler with the mouse and drag a green line onto the document that will not print in the final draft. 

How to "Undo" Something: Then I taught him “control z” the command that will undo the last thing you did, so when you make a mistake there’s no need to worry, just “ctrl z” and you can undo it! 
I showed him how to add a text box and let him type out the front of his tag.  This was a little painful to watch him hunt and peck.  Note to self we need to find some fun keyboarding games to learn how to type.

Highlight words to change their font
Format Your Text: Then I taught him how to highlight his text to change the size, positioning and line spacing.  We changed the color and font.  I had him settle on one font and then he decided to make each letter in the word "color" a different color.  I told him that if he made one thing on the tag a different color and only used that one color that it was called spot color.

Adding Clipart: Then we added one piece of clip art.  I showed him how to change the text wrapping so that the words and the image were in their own space and not overlapping. 

Add spot color to for emphasis
Keep it Simple: Then we worked on the other side of the tag.  (I was sure to create a new text box so it could be turned upside down when we were finished with it.)  He was excited to choose a different font, but I told him that it’s nice to choose a fancy font for one thing and choose a simple font for the rest so they don’t compete.  He chose to add spot color for his name. 

Turning a Text Box: Then we turned the top portion of the tag upside down by clicking on the green circle at the top of the text box and while holding the button down dragging it in a circle as the box turned. 

Copy and Paste: We selected all the elements of the tag once we were satisfied with how it looked and used “control c” to copy and “control v” to paste it until we had 6 tags per page.

Do the Math: We determined how many sheets we’d need to print.

After printing the tags on white cardstock I cut them out with my paper cutter and helped him fold them and staple them to the bag. 


They came out great!  And he made all the design choices with only a little help from me.  I hope this will encourage you to try designing something with your creative little heart.


Sunday, February 9, 2014

Martha Speaks: A School Poster Project for the One Hundredth Day of School


Tomorrow may be the one hundredth day of school, if it doesn’t snow in the wee hours of the morning. It has been pushed back several times because of snow days.  Either way my son’s one hundredth day poster project is ready to go.  We are big Martha Speaks fans at our house.  If you haven’t watched it, its very clever and funny.  It’s about Martha, a dog who eats alphabet soup and the letters lose their way, they travel to her brain and now she can talk – the theme song is great and tells you the whole back story.  You can find it on Youtube, but better yet catch a whole episode on your local PBS station.


My son had to put together a creative grouping of 100 things.  I helped him brainstorm a whole list of possibilities and then he settled on this one.  During the opening of the show a scientist explains how Martha started speaking with a visual aid of an ex-ray showing alphabet noodles traveling straight to her brain.  So I lightly drew an outline of Martha from the show’s logo and cover illustration from the original book by Susan Meddaugh.  Then my son cut it out and traced the head portion to create a flap.  He glued the top and colored in the details and added the ex-ray of her brain under the flap where you can count one hundred alphabet soup noodles.  Happy One Hundredth Day!


Saturday, February 8, 2014

Solving Potty Training with Puzzles

When potty training our two boys we tried having them earn m&m’s and using sticker charts, but they kind of lost interest.  So a friend of mine, who is a special needs teacher, asked me if the boys liked to do puzzles.  She suggested a strategy that she uses in the classroom.  Figure out what they are interested in and then take an image of it, cut it into pieces and each time they complete the task, in this case using the potty, they earn a piece of the puzzle.  Once the puzzle is complete they earn a reward.  Start by dividing the picture up into a few large pieces so they start off by quickly earning their reward and as they make progress cut the pictures into more, smaller pieces so they take longer to earn.  Since I am good at drawing, I just took a matchbox car or toy model airplane (these are what interested my guys) and drew a picture of it and cut it up. If drawing isn’t your strong suite you could take a photo and print it out and then cut it up, or do a google image search or search for a “coloring page” of that character or object.  We also used puzzles of ice cream sundaes and the Chuck E. Cheese logo or the front of a movie dvd case to earn a family outing or movie night. There is an element of surprise as the child unveils their surprise one puzzle piece at a time.  Eventually both of my boys had earned a handful of prizes and got into the habit of using the bathroom without needing to be rewarded.  We also tailored the reward system for what they needed to work on, for example at first it was using the potty, when that was mastered we gave them a puzzle piece only after they had “flushed and washed”. 

Another friend with older children advised, “Do whatever it takes!”  Some parents don’t want to bribe their children for doing something they should do, but in our experience using rewards encouraged them and celebrated their achievement, and they didn’t expect prizes forever.  Eventually, the seemingly impossible task was completed, they were fully potty trained!

Materials:
paper
scissors
image
tape
envelope
Instuctions:
1.       Create or print out an image of their reward. 
2.       Cut it into the desired number of pieces. 
3.       As you cut up the picture, trace the outer edge of the puzzle pieces onto a blank piece of paper to act as a guide when your child is putting together their puzzle. 
4.       Tape the blank paper on the wall in the bathroom with painter’s tape that can easily be removed later and keep the puzzle pieces in an envelope in the bathroom along with some tape so you’ll have everything accessible when they earn their puzzle pieces.